

First Steps with MobilOS
Welcome to MobilOS! This quick guide will help you take your first steps and set up your account to start managing your field operations. If you prefer, watch our video tutorial.
1. Registration and First Login
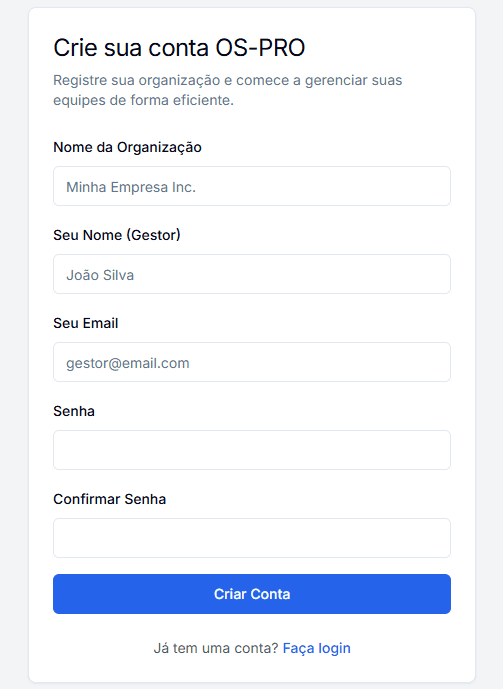
The first step is to create your account and your organization's account.
Complete your Registration
If you don't already have an account, visit our registration page.
During the process, you will provide:
- Your Organization/Company name.
- Your full name as the main Manager user.
- Your email (which will be your login).
- A secure password.
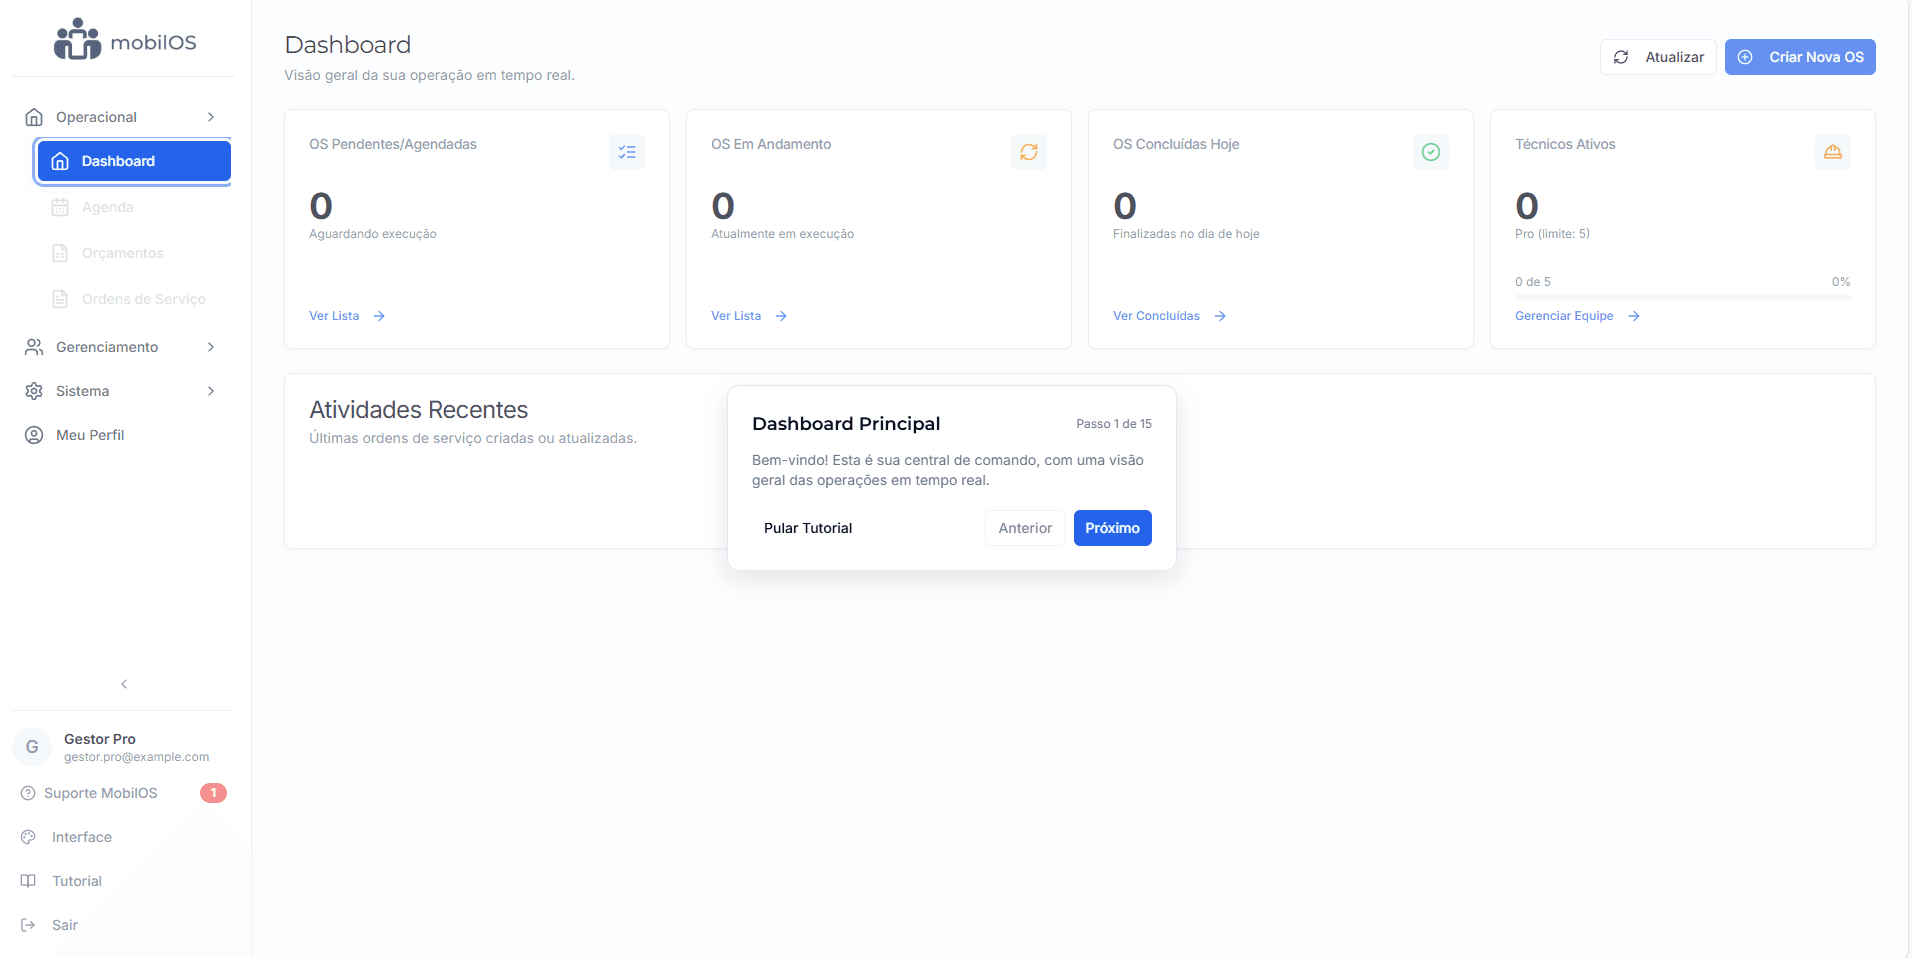
First Access to the Dashboard
After logging in, you will be directed to the Main Dashboard, where you will have an overview of your operations.
If it's your first access, a guided tutorial will appear to help you familiarize yourself with the main areas of the system.
2. Essential Initial Settings
Before diving into daily operations, some initial settings can customize and better prepare the system for your company.
Organization Logo
Customize the interface with your company's visual identity.
- Navigate to My Profile (usually at the bottom of the side menu).
- In the 'Organization Logo' section, upload your logo file.
- Recommended formats: PNG (preferably with transparent background), JPG, SVG. Ideal size: up to 400x100 pixels.
See more details in Configuring the Organization Logo.
Check your Subscription Plan
To ensure access to all features and appropriate limits (such as the number of technicians), go to the Subscription section in the menu.
- If you are in a trial period, see the expiration date.
- To activate a paid plan or upgrade, choose the desired option on the Plans page.
More information in Subscription and Billing.
3. Populating the System with Essential Data
With the basic settings ready, it's time to add the fundamental data for your operation:
Clients are the basis for your quotes and WOs.
- In the menu, in the 'Management' section, go to 'Clients'.
- Click the New Client button.
- Fill in name, contact, and address.
- Save the new client.
Complete guide: Managing Clients.
Standardize the services your company offers.
- In the menu, in the 'Management' section, go to 'Service Catalog'.
- Click the New Service button.
- Enter the service name, description (optional), and price.
- Save the new service.
Details in: Service Catalog.
Register your team's qualifications for smart assignments.
- In the menu, in 'Management', go to 'Specialties'.
- Click the New Specialty button.
- Create categories such as 'Building Electrical', 'HVAC', 'IT Networks', etc.
- Save the new specialty.
Learn more in: Specialties and Suggestions.
Register your field and office team members.
- In the menu, in 'Management', go to 'Team'.
- Click the New Member button.
- Fill in the data and assign the role (Technician, Coordinator).
- If a technician, assign their registered specialties.
Detailed guide: Managing your Team.
4. Performing First Operations
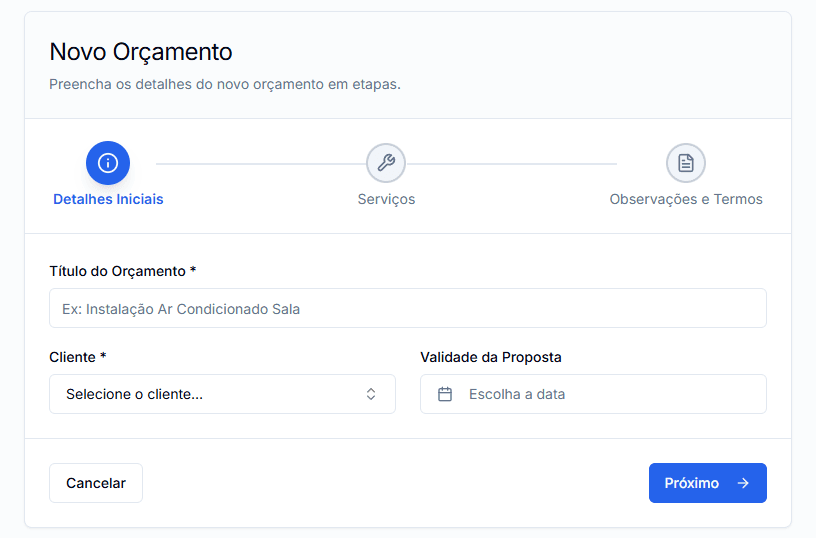
Create a Quote (Optional)
If your process includes sending formal proposals:
- Go to 'Quotes' and click '+ New Quote'.
- Select the client, add services from the catalog, set validity and terms.
- Save as draft or send to client for approval.
More in: Managing Quotes.
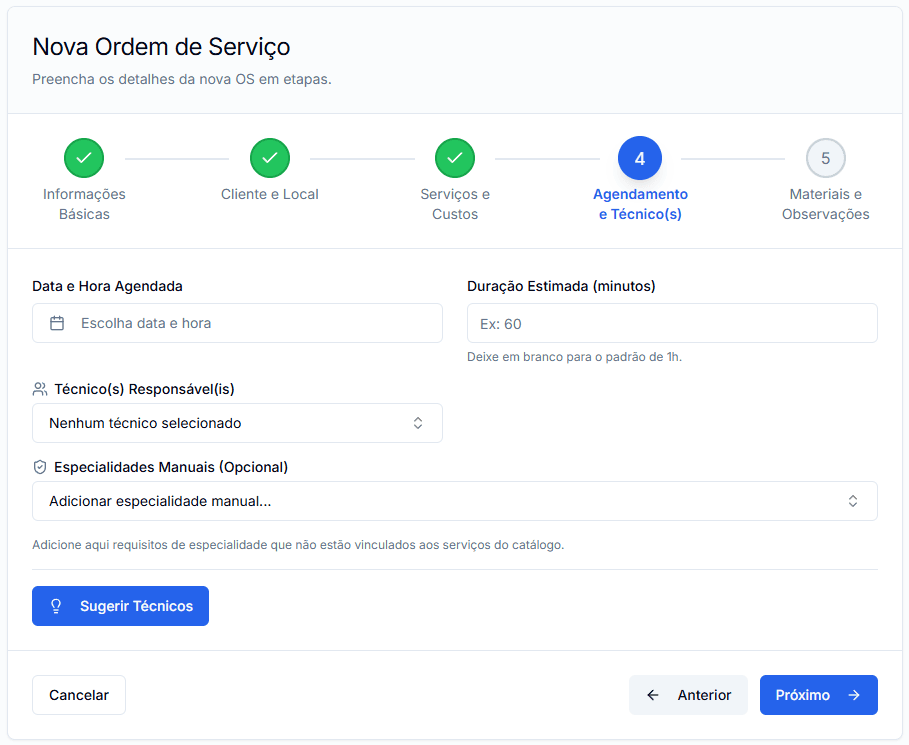
Create a Work Order
To schedule and dispatch a service:
- Go to 'Work Orders' and click '+ New WO' (or convert an approved quote).
- Fill in the details: client, description, services, responsible technician(s), scheduling.
- Save the WO. Assigned technicians can be notified.
Complete guide: Managing Work Orders.
Next Steps in the Documentation
You Are Ready to Begin!
With these steps, your OS-PRO account is configured and ready for basic operations. Now, explore the other sections of the documentation to delve into each module: